How to Upload a Code to Any Arduino Board
Arduino Howto
This page is obsolete. You should instead come across the Windows Howto or the Mac OS X howto (both in the Arduino guide).
These are the steps you lot need to follow in lodge to be upwardly and running:
- Get an Arduino board
- Download the Arduino surround
- Install the USB drivers
- Connect the board
- Upload a program
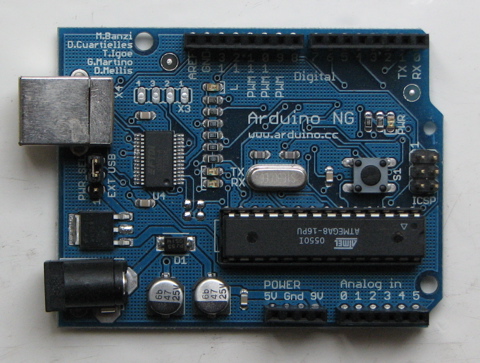
1 | Get an Arduino board
The Arduino i/o board is a simple circuit featuring the ATmega8 processor from Atmel. The board is composed of a printed circuit board (PCB) and electronic parts.
There are a few means to get an Arduino board:
- purchase a ready made lath. See how y'all tin can purchase a board or just the PCB.
- European benefactor
- US distributor
- build your own lath. If you want you tin build your own PCB just by downloading the CAD files from the Hardware page. Extract the .brd file and send it to a PCB manufacturer. Be aware that manufacturing a unmarried pcb will exist very expensive. It's better to get together with other people and make 20 or 30 at a fourth dimension. Since you get the full CAD files you can make your own customised version of Arduino. if you brand modifications or fix bugs please transport united states of america your changes!
- purchase parts. buy the parts from whatever electronics store. The Serial version in particular has been designed to use the well-nigh basic parts that tin can be found anywhere in the world. The USB version on the other paw requires some avant-garde soldering skills because of the FTDI fleck that is an smd role. Here is a list of parts for the serial board.
- gather the board. We put together a footstep by step guide on how to build an arduino board. Newbies: never soldered earlier? afraid of trashing thousands of boards earlier getting 1 properly soldered? fright non :) learn to master the fine art of soldering.
- program the bootloader. In order for the development environment to be able to programme the chip, this has to be programmed with a piece of code called bootloader. See the bootloader page on how to plan it on your chip.
2 | Download the Arduino environs
To plan the Arduino board yous need the Arduino environs.
Download Arduino: From the software folio?.
Linux annotation: For aid getting the Arduino IDE running on Debian, delight come across the FAQ ("How can I run the Arduino IDE nether Linux?").
Mac Bone X note: After downloading the IDE, run the macosx_setup.command. It corrects permission on a few files for utilize with the series port and volition prompt yous for your password. You may demand to reboot after running this script.

For more than information, come across the guide to the Arduino surround.
3 | Install the USB drivers
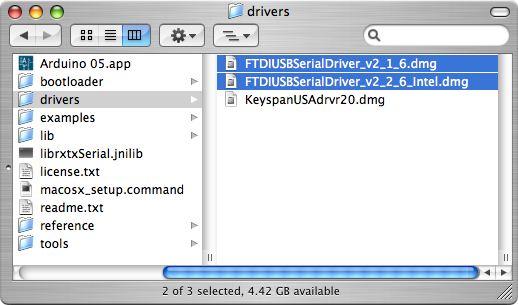
If you are using a USB Arduino, you will need to install the drivers for the FTDI chip on the board. These can exist institute in the drivers directory of the Arduino distribution.
On Windows, you lot will need to unzip FTDI USB Drivers.zip. And so, when you plug in the Arduino board, point the Windows Add Hardware wizard to the FTDI USB Drivers directory.
On the Mac, mount the FTDIUSBSerialDriver_v2_1_6.dmg (on PPC machines) or the FTDIUSBSerialDriver_v2_2_6_Intel.dmg (on Intel machines) disk prototype and run the included FTDIUSBSerialDriver.pkg.
The latest version of the drivers can be constitute on the FTDI website.
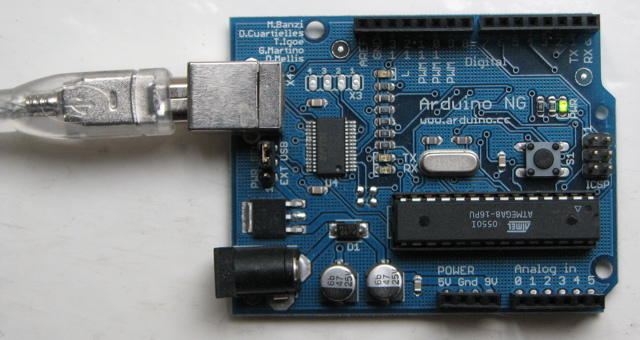
4 | Connect the board
If you're using a serial board, power the board with an external ability supply (6 to 25 volts DC, with the core of the connector positive). Connect the board to a serial port on your computer.
On the USB boards, the ability source is selected by the jumper between the USB and power plugs. To ability the lath from the USB port (good for controlling low power devices similar LEDs), identify the jumper on the two pins closest to the USB plug. To power the board from an external power supply (needed for motors and other loftier electric current devices), place the jumper on the two pins closest to the power plug. Either way, connect the lath to a USB port on your computer. On Windows, the Add together New Hardware wizard will open up; tell it you want to specify the location to search for drivers and betoken to the folder containing the USB drivers you unzipped in the previous stride.
The power LED should go on.
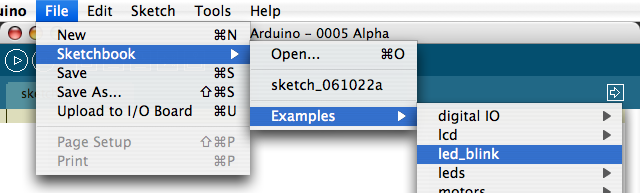
5 | Upload a program
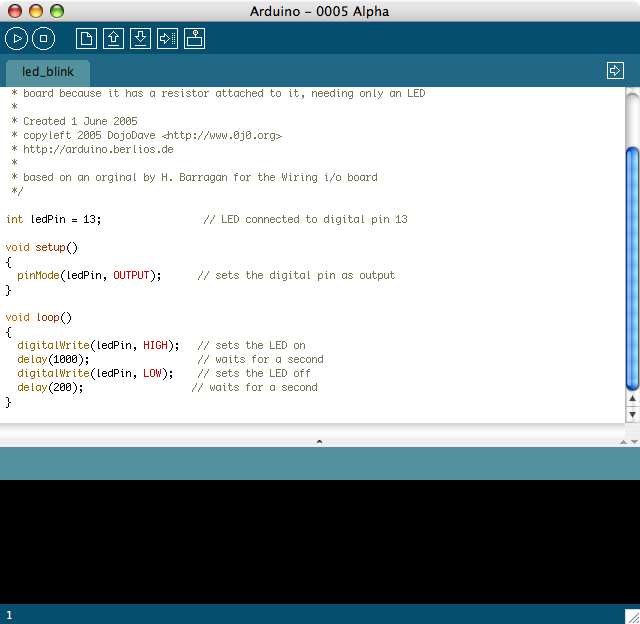
Open the LED blink instance sketch: File > Sketchbook > Examples > led_blink.
Here's what the code for the LED blink example looks like.
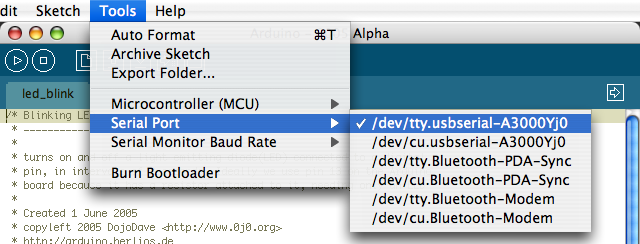
Select the serial device of the Arduino lath from the Tools | Serial Port menu. On Windows, this should exist COM1 or COM2 for a serial Arduino lath, or COM3 , COM4 , or COM5 for a USB board. On the Mac, this should be something similar /dev/cu.usbserial-1B1 for a USB board, or something like /dev/cu.USA19QW1b1P1.1 if using a Keyspan adapter with a serial board (other USB-to-serial adapters use different names).
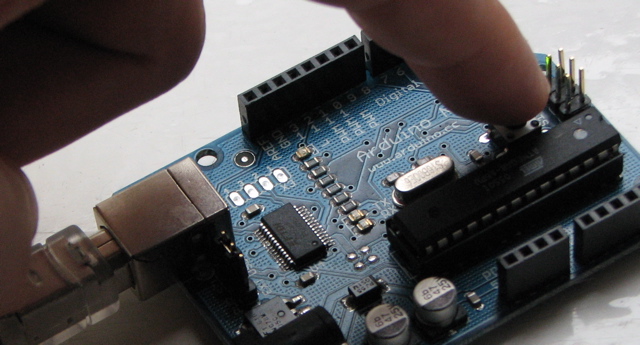
Push button the reset button on the board then click the Upload push button in the IDE. Wait a few seconds. If successful, the message "Washed uploading." volition appear in the status bar.

If the Arduino board doesn't show up in the Tools | Serial Port carte du jour, or you get an mistake while uploading, please see the FAQ for troubleshooting suggestions.
A few seconds after the upload finishes, you should run across the amber (xanthous) LED on the lath beginning to glimmer.
Learn More
- Read about the Arduino Surround
- Learn about the parts of the Arduino board
- Meet the tutorials for some example programs. (There are also some examples available in the
examplesdirectory inside the arduino directory.) - Expect up specific Arduino functions and syntax in the reference
- The Arduino programming linguistic communication is compatible with the Wiring language allowing porting applications from the Wiring board to Arduino. Please note the differences between the Wiring and Processing languages.
- If y'all're having problems, cheque the FAQ.
- If yous don't find a solution there, endeavor posting in the forums.
Source: https://www.arduino.cc/en/main/howto
0 Response to "How to Upload a Code to Any Arduino Board"
Post a Comment